How to Grow Chervil Microgreens at Home
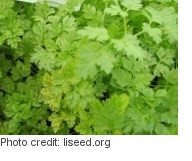
Growing micro-chervil — which refers to young chervil at its early seedling stage — at home is a rewarding and fun activity for the whole family. All you need is a plastic container, high quality chervil seeds, potting soil (or another chemical-free growing medium), sunlight, and water. Micro-chervil, or chervil microgreens, can be used to lend their fine, anise-like flavor to salads. They also make an attractive and tasty garnish to fish dishes, steamed vegetables, and omelettes. To grow a batch of chervil microgreens indoors, simply follow these instructions:
- Buy high-quality organic chervil seeds. Note that chervil seeds may also be sold by the plant's alternative names which include gourmet parsley and garden chervil. The scientific name for garden chervil is Anthriscus cerefolium. When buying chervil seeds, make sure the seeds are from a crop harvested less than a year earlier and that they haven not been treated with pesticides or fungicides.
- Fill a seed-starting tray or another container with damp soil mixture and then sow chervil seeds thickly across the entire soil surface. Sprinkle a thin layer of fine-textured soil on top of the seeds. Put a clear plastic wrap with vent holes over the top of the container — this will help reduce watering frequency during germination. Remove the cover once the seeds have germinated.
- Place the container or tray near a bright window. If you want to grow chervil microgreens outdoors, place the container on a spot with partial shade. Although chervil can tolerate full sun, it grows best in partial shade, especially in the afternoon when the weather is hot.
- Grown in containers, chervil microgreens can dry out fast so regular watering is necessary. To ensure the water is fully absorbed by the soil and the roots, water your chervil microgreens in the morning rather than in the evening. For best results, water with a hand-held sprayer, keeping the soil as damp as a wrung-out sponge.
- Compared to other microgreens, chervil takes a relatively long time to germinate and grow. You may have to wait 20 days or even longer before your chervil reaches a microgreen size. Once your microgreens are ready for harvest, get a pair of sharp kitchen shears and snip off everything except the very bottom of the stem. Use your chervil microgreens right away as they tend to wilt soon after cutting.